What Does Save For Web Mean?
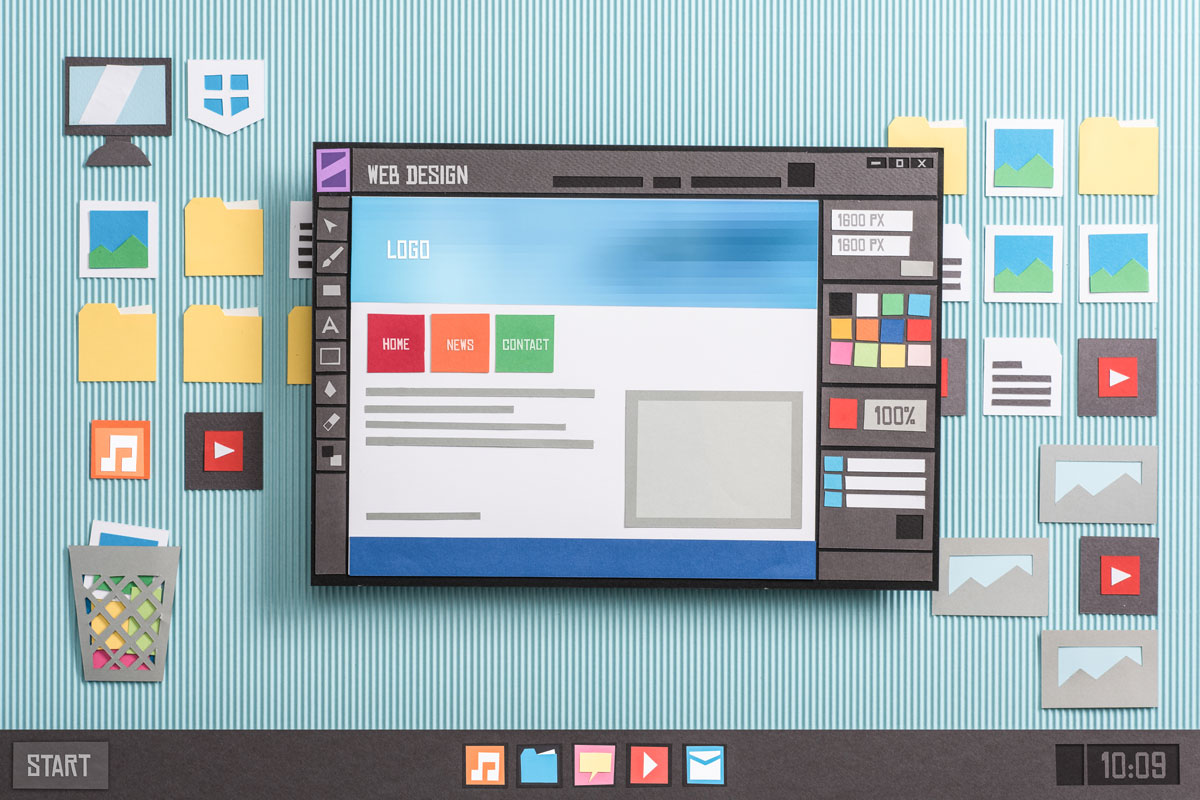
Whether you are writing a Do It Yourself (DIY) article or showcasing a recipe you made, pictures play an important role in visually describing a story to your audience.
Imagine in today’s time if you had to sit and wait for an image to load piece-by-piece as if you were using 90’s dial-up technology. You would exit out of that site faster than the Flash.
Users will typically upload an image to their website with no regards to it’s file size. Yes, that 10MB image might not seem large by itself, but it will burden a website much like wearing a parka burdens a swimmer.
Using Save For Web In Photoshop
This is where Save for Web comes in. Save for Web in Photoshop optimizes an image for your browser by doing the following:
- Lowering the image quality to 72 ppi (pixels per inch)
- Reducing the image’s file size
- Converting the image to RGB (Red Blue Green) format
Let’s do our audience a favor and learn how to use Photoshop to save images for web.
Save For Web – The Long Way
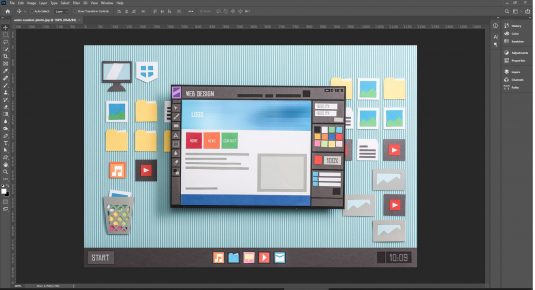
Open up the image in Photoshop.
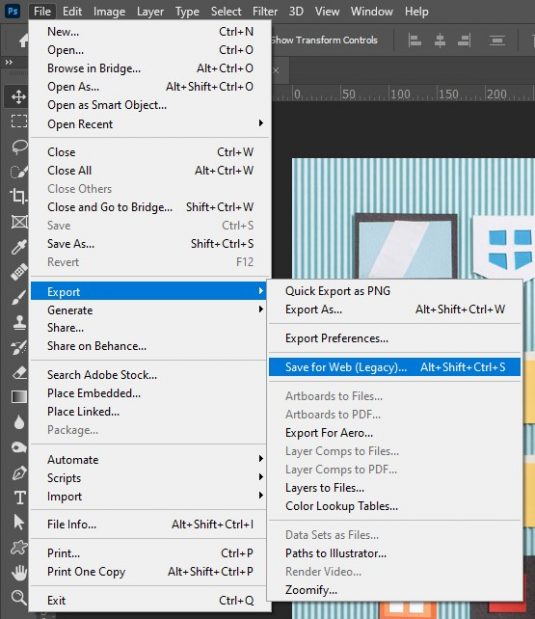
Go to File > Export > Save for Web (Legacy)…
You can get to this option faster by using the keyboard shortcut displayed in the dropdown menu.
You can get to this option faster by using the keyboard shortcut displayed in the dropdown menu.
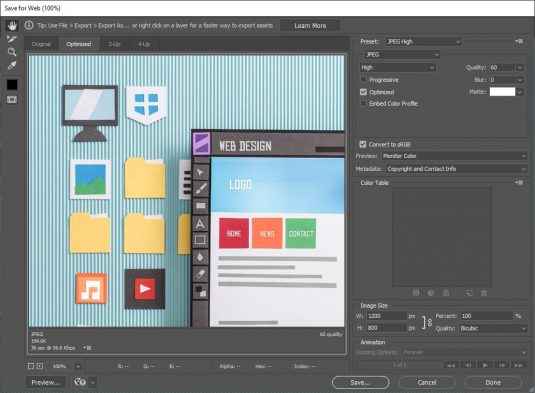
The Save for Web popup should have come up.
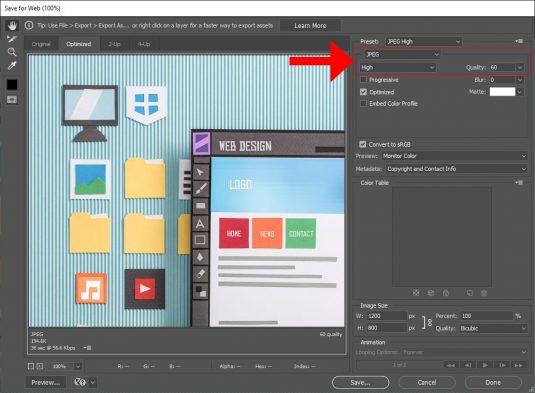
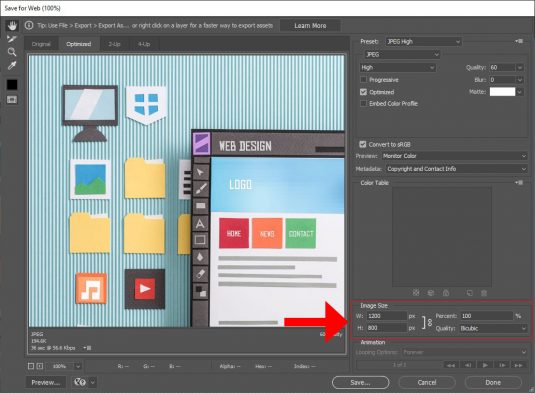
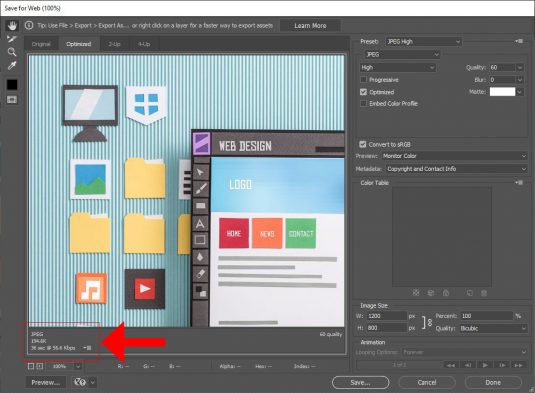
There are a lot of options to configure, but we are only going to focus on three sections: The image type and quality, the image width and height, and the image file size.
Image Type And Quality
Here, you can select if you want the image to be saved as a JPG, PNG, or GIF.
With JPG, you can alter the quality percentage.
Image Width And Height
In this section, you can modify the image’s width/height or the image size percentage.
Image File Size
This section will update dynamically after each adjustment you make in order to provide you with the accurate image file size information. Use this to gauge how small/large you want your image size to turn out.
Use this with discretion as you should never sacrifice quality for image size.
Click on the Save… button, save your image, and you’re good to go!
Save For Web – The Short Way
If moving your mouse (or trackpad if you’re using a laptop) is too much of a hassle, here is a keyboard shortcut alternative to quicken the save for web process.
Simply press CTRL+ALT+SHIFT+S (Windows) or CMD+SHIFT+ALT+S (Mac) and the Save for Web window will appear to process your next command.
And That’s It, You’re Done!
Phew, you did it. Your image is now website-ready for upload.
Apply this method for all the images you place on your site. It could make the difference between waiting five seconds for your website to load or five minutes (which in internet land is forever).
I hope you were able to learn something new! If you would like to know more about a certain web-development topic and want me to do a tutorial about it, shoot me a message and let’s make it happen.

